The sun does not shine in Talamh; it oppresses. Under the iron fist of Sun King Azra, the land itself seems to weep, its colors muted by the weight of tyranny. You awaken not as a hero, but as a spark of defiance in the darkness—a rebel with a forgotten past and a destiny intertwined with the very heart of this broken world. Your journey in Absolum is not one of glorious conquest, but of desperate survival and relentless growth. Each clash with the Crimson Order is a lesson written in steel and blood, and each fall is but a prelude to rising again, stronger than before.
This Absolum Beginner’s guide is your first ally in the shadows. It is a collection of hard-won wisdom from the front lines, designed to transform you from a fledgling rebel into a genuine threat to Azra’s reign. We will walk through the essential strategies of combat, the unique strengths of your fellow champions, and the subtle arts of progression that turn temporary failure into permanent strength. This is more than a list of tips; it is a pathway to power, forged in the fires of rebellion.
Combat Survival

The world of Talamh is unforgiving. Sun King Azra’s Crimson Order soldiers patrol every path, and they will not hesitate to cut down a fledgling rebel. Your survival hinges not on brute force, but on mastering the dance of combat. The clang of steel and the flash of spells are the rhythms of Absolum world, and you must learn to move with them.
The golden rule in Absolum is simple: a dead rebel deals no damage. Your primary focus should be on learning how to avoid taking damage altogether. This means moving beyond simple dodging and mastering the game’s more advanced defensive techniques.
- Deflect is Your Best Friend: This is your primary Absolum defensive tool. By dashing into an enemy’s attack just before it lands, you will parry the blow, leaving the attacker stunned and vulnerable for a counter-attack. It has a generous window and should become your default reaction to incoming strikes. It is the difference between being overwhelmed and controlling the flow of battle.
- The Power of Clash: For the bold, Clash is a high-risk, high-reward parry using your heavy attack. It is harder to time but creates a massive opening to punish your foe, making it especially valuable against bosses once you have learned their patterns. If you are struggling with the timing, note that Karl’s headbutt special move is widely considered the easiest tool to perform a Clash with, thanks to its quick start-up.
- Dodge to Reposition: The standard dodge is perfect for creating space and sidestepping dangerous area-of-effect attacks. Remember, you can dodge up and down as well as left and right. Sidestepping an attack at the last moment will also open the enemy up for a follow-up.
Beyond defense, two offensive concepts will dramatically increase your effectiveness.
- Punish Damage: Bosses and larger enemies have powerful, telegraphed attacks. After they whiff one of these big moves, they are left vulnerable. Hitting them during this brief window deals significant Punish Damage (indicated by a red hit spark) and rapidly fills their stun meter. A stunned boss can be juggled for massive damage, so learning these windows is non-negotiable for success.
- Embrace the Juggle: An enemy in the air cannot hit you. Use launching attacks to get foes airborne, then continue hitting them with aerial combos. This is a safe and effective way to clear mobs. Galandra’s running knee attack, for example, is excellent for picking up downed enemies to start a juggle.
Here is a quick reference to keep these core combat concepts sharp in your mind:
| Concept | Input / Method | Key Benefit | Pro Tip |
|---|---|---|---|
| Deflect | Dash into an attack just before impact | Parries the attack, leaves enemy vulnerable | Your most reliable defensive tool. Practice this above all else. |
| Clash | Use a heavy attack against an enemy’s attack | Creates a huge opening for punishment | Use Karl’s headbutt for the easiest and most consistent Clash timing. |
| Punish Damage | Hit a boss after they miss a big attack | Deals extra damage and builds stun meter | Look for the red hit spark. This is your cue to go all-in. |
| Juggling | Use launching attacks and aerial combos | Keeps enemies helpless and safe | Galandra’s running knee is a great tool to start a juggle from the ground. |
Choosing Your Champion: A Guide to Absolum Characters
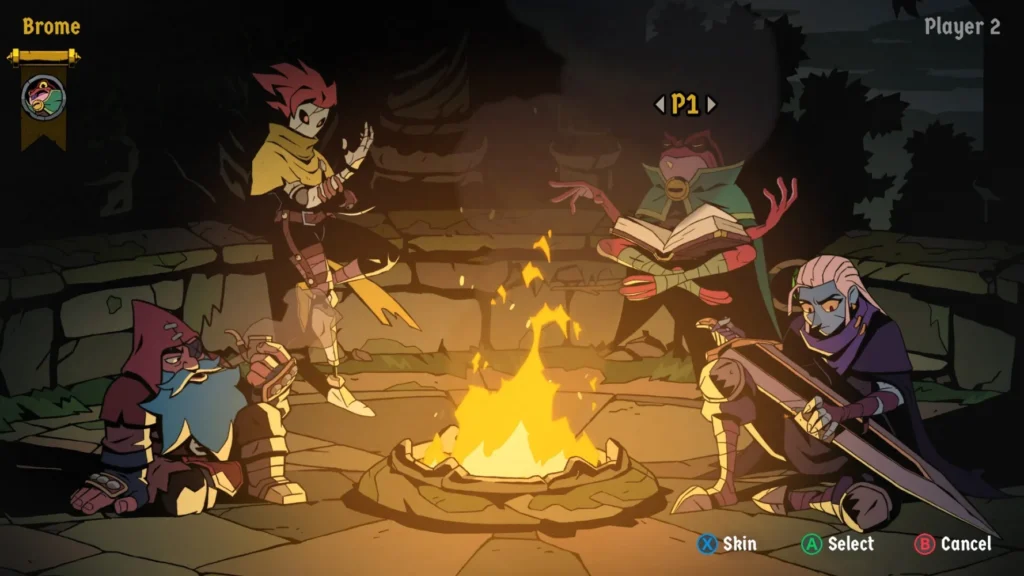
in Absolum You will not be fighting this war alone. You will eventually have a band of four unique rebels at your disposal, each with a distinct fighting style and personality. While you should try them all, I strongly recommend sticking with one character at first. The currency you earn to unlock new Arcana and passive upgrades is character-specific, so focusing your efforts will yield faster and more noticeable power growth for your chosen hero.
- Galandra, the Necromantic Knight: Wields a colossal sword and commands chilling necromancy. She is a force of nature, perfect for players who like to be in the thick of it, trading powerful, deliberate blows. Her calm demeanor belies a furious anger.
- Karl, the Dwarven Brawler: An unyielding colossus and poet at heart, Karl fights with his enchanted weapon, Beste. He excels in up-close brawls but also possesses a blunderbuss for ranged options. He is a versatile pick for those who like to mix it up.
- Brome, the Frog Wizard: A Mowlaï wizard prodigy on a mission to save his people. He levitates, using his staff for melee combos and devastating ranged and area-of-effect spellcasting. He is an excellent choice for players who prefer to control the battlefield from a distance.
- Cider, the Nimble Skirmisher: An enigmatic fusion of human and construct, Cider is all about speed, mobility, and ruthless precision. With high-flying kicks, handaxes, and an extendable arm, she is ideal for players who favor agility and complex combos over raw power.
Rituals, Progression and Economy
As a roguelite, Absolum is a game of permanent progression. Each failed run makes you stronger, paving the way for future success. This happens through several key systems back at your sanctuary, Uchawi’s Hearth.
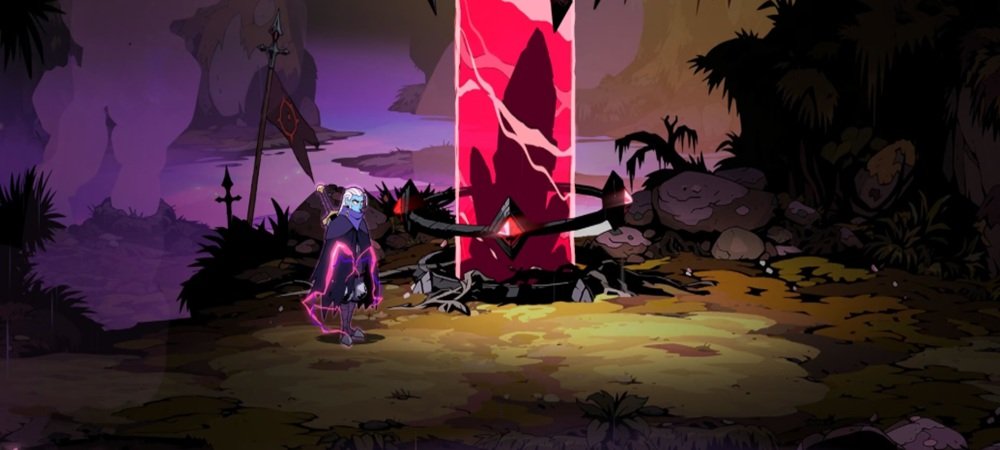
The Power of Rituals
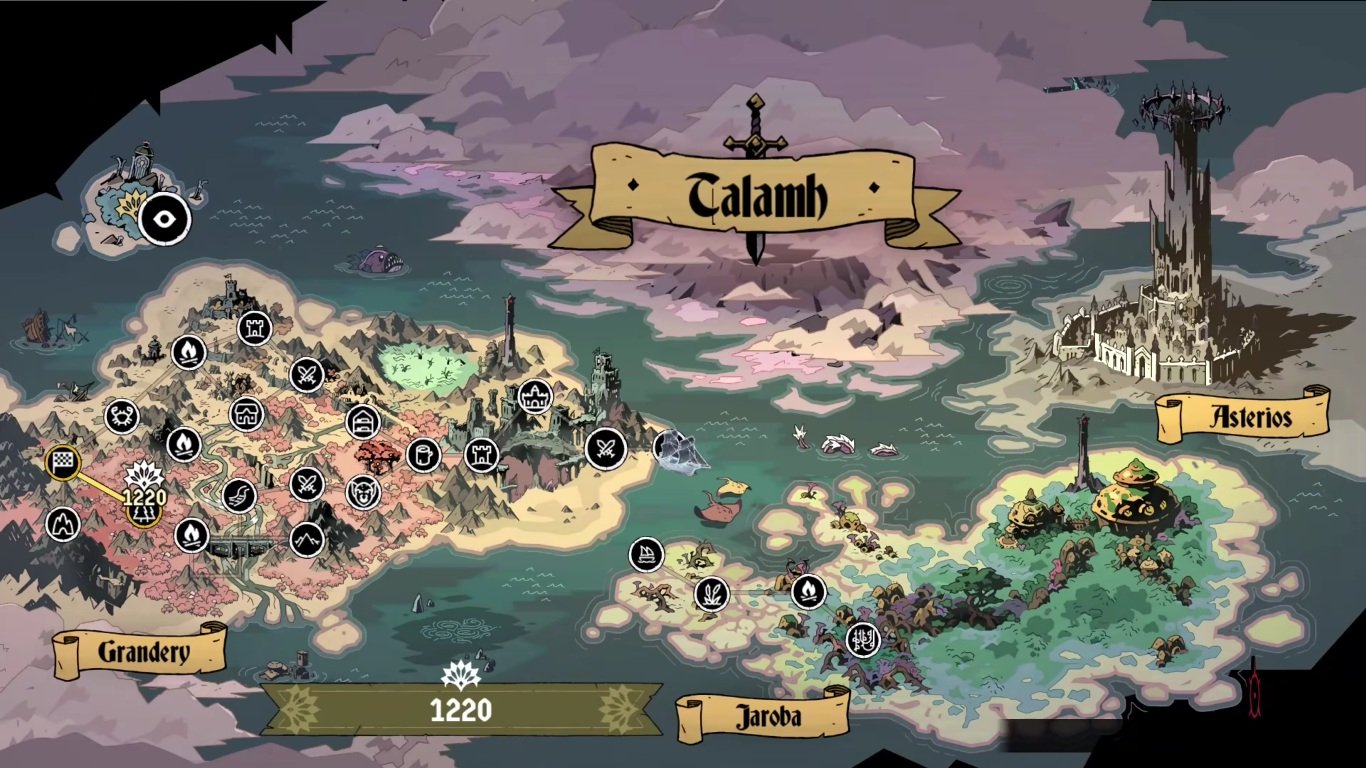
in Absolum Rituals are the elemental upgrades you find during a run, similar to Boons in Hades. They are the cornerstone of your build and can completely change your character’s capabilities. You must first find and break large, chained crystals in the world to unlock each element for future runs. The order can vary, but here are some key locations:
- Fire: Unlocked automatically during the prologue.
- Water: Found by heading upwards to the Old Coast at the start of a run.
- Wind: Located by heading through the Giggling Forest early on.
- Bramble: Unmissably found in the second region, Jaroba.
- Necromancy: Discovered in the secret fourth region, Yeldrim.
Once unlocked, you will find crystals during runs that offer a choice between two random Rituals. Later, an NPC in Jaroba can upgrade this to a choice of three. Always try to build synergies. For example, if you are playing Brome with a powerful projectile Arcana, seek out Time Elemental Rituals that create an echo of your spellcasts.
Permanent Progression and Smart Economy
Your home base is where you turn temporary failures into permanent strength.
- The Tree of Talamh: This is your primary upgrade tree. Spend the Crystals you collect on runs to permanently increase your health, damage, and unlock powerful abilities like self-revives. Do not neglect this. Upgrading this tree is the most direct way to ease the game’s difficulty.
- Spend Gems Wisely: Gems are another currency used for permanent upgrades and, later, for re-rolling Ritual choices. Save your gems for the upgrade tree at all costs. The power spike from these upgrades far outweighs the benefit of a single re-roll. Only consider re-rolling if you are in the final area and one good Ritual away from potentially beating the final boss.
- Glimmering Arcana: Before each run, when selecting your starting Arcana (your super attack), one will be glowing. Always pick the glowing one, as it provides an experience bonus for that run, speeding up your overall progression.
Absolum Exploration Strategy
The path to Asterios is fraught with danger, but a clever rebel knows more than just how to swing a sword.
- Break Everything: Your first instinct in any new area should be to smash every barrel, crate, and pot in sight. These breakables are a primary source of food (health), gold, and Crystals. Leaving them intact is leaving power on the table.
- Health is a Precious Commodity: Healing is rare. The Hearth rest stops will only heal you to a certain percentage, and food drops are unreliable. This makes the defensive skills we discussed earlier even more critical. Sometimes, the best decision is to avoid an optional miniboss fight if your health is too low to risk it.
- The Value of an Ally: In taverns and rest areas, you can spend gold to hire an ally. While they do not deal much damage, they are incredible for drawing enemy aggro. The health you save by having enemies attack them instead of you is often worth far more than the gold spent.
- Seek the Second Island Quickly: After you defeat the Undead King boss of the first island, you will set sail and be given a choice. Make it a priority to head to the southern island, Jaroba (the “living lands”). A crucial vendor and the final playable character are found on this route. Most importantly, this is where you can finally spend the Fruits you may have been hoarding at camp.
Your journey in Absolum will be long, and you will fall many times. But each return to the Hearth makes you wiser and stronger. Learn from every defeat, celebrate every small victory, and keep the image of a free Talamh in your heart.