Aurena stands apart in the roster of Shape of Dreams travelers, embodying one of the game’s most challenging yet rewarding playstyles. Where other characters rely on conventional resources, Aurena treats her very health as a currency for catastrophic damage output. This guide will transform your perspective on this complex character, revealing how to master her delicate balance of self-inflicted vulnerability and overwhelming power.
The dream lore of Shape of Dreams reveals Aurena as a being caught between realities, her physical form slowly dissolving into The Rapids. This narrative perfectly mirrors her gameplay – she must constantly tear herself apart to wield her most potent abilities, then reclaim that substance from the enemies she destroys. It’s a terrifying dance on the edge of oblivion that, when mastered, allows you to obliterate nightmares that would make other travelers flee.
Aurena Identity
Aurena is categorized as a “Very Hard” character for excellent reason – she demands aggressive positioning, meticulous resource management, and the courage to operate at critically low health levels. Unlike traditional glass cannons who simply avoid damage, Aurena intentionally sacrifices her own health to fuel her most devastating attacks, then immediately replenishes it through well-executed combat maneuvers.
- The Aggression Paradox: With Aurena, conventional survival instincts will get you killed. Where other characters retreat at low health, Aurena must often press forward into the fray precisely when her health bar looks most alarming. Her entire kit revolves around converting that apparent vulnerability into sudden, fight-winning bursts of damage and healing. Playing her successfully requires rewiring your brain to see health not as a precious resource to preserve, but as a renewable tool to be spent strategically.
- The Dream Weaver Fantasy: What makes Aurena compelling despite her steep learning curve is the sheer power fantasy she delivers. A perfectly executed Aurena combo can evaporate entire screens of enemies in seconds, turning certain defeat into overwhelming victory. When you find yourself surrounded by nightmares with barely a sliver of health remaining, only to unleash a perfectly timed Golden Explosion that annihilates everything while restoring you to full health – that transformative moment is why players dedicate themselves to mastering her complex mechanics.
Abilities
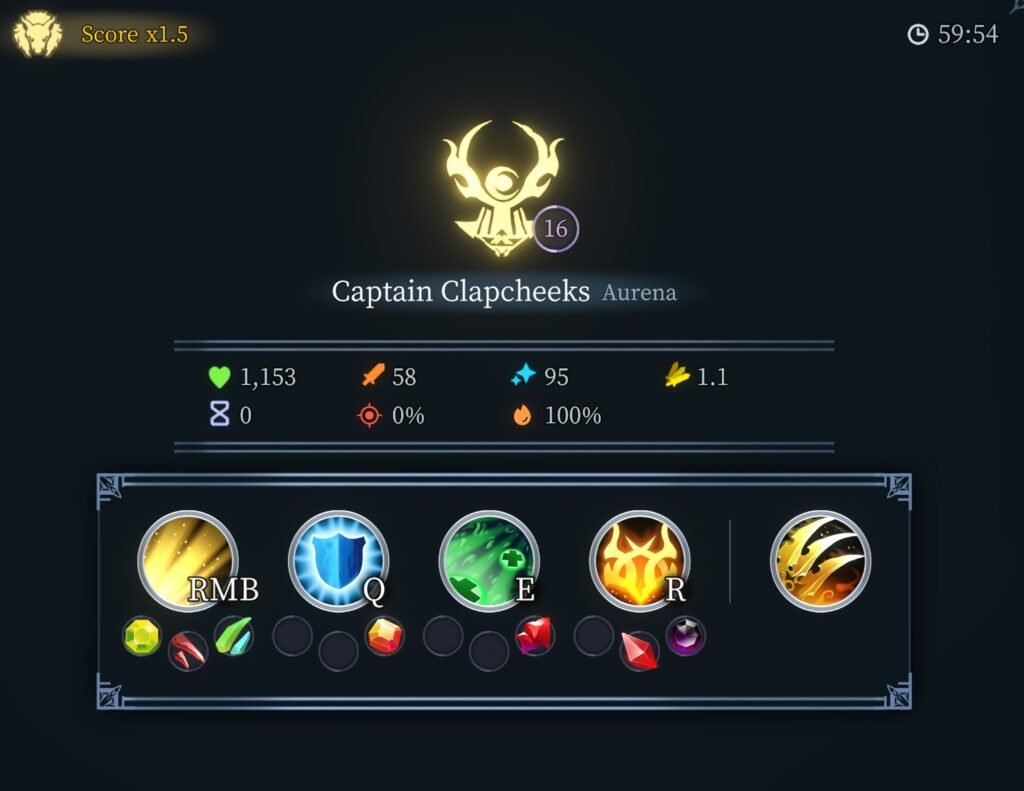
Golden Explosion (RMB)
This ability stands as the cornerstone of Aurena’s gameplay and the source of both her greatest strengths and most dangerous weaknesses. Golden Explosion unleashes a massive area-of-effect burst that deals tremendous damage at the cost of a significant portion of your health. Learning to manage this health cost while maximizing its damage potential is the fundamental challenge of playing Aurena.
Upgrade Priority: Maximum investment. You’ll want to pour every available Dream Dust into enhancing Golden Explosion’s level whenever possible. The damage scaling and potential health cost reduction at higher levels make this non-negotiable for serious Aurena play.
Dangerous Theory (Passive)
Aurena’s passive ability provides lifesteal on basic attacks, converting a percentage of the damage you deal back into health. This seems simple on the surface but becomes profoundly strategic in practice. Dangerous Theory transforms every enemy on the screen into a potential health pack, allowing you to rapidly recover from the self-inflicted damage of Golden Explosion through well-aimed basic attacks.
Strategic Insight: Many abilities that state they “proc on-hit effects” will also trigger Dangerous Theory’s healing at reduced efficiency (approximately 25% according to player testing) . This includes popular choices like Whirlwind and Umbral Edge, opening up creative build possibilities beyond basic attack spam.
Beam of Light (Space)
This mobility tool serves as both repositioning mechanism and emergency healing source, especially valuable in the early game before you’ve assembled your core essence combinations. While Beam of Light may see less use in optimized late-game builds where Golden Explosion spam dominates, it remains invaluable for surviving specific boss mechanics and recovering from positioning mistakes.
Flexible Ability Slot (Q)
Aurena’s Q slot represents her most flexible tool, with optimal choices varying based on your current build and playstyle preferences. Popular options include:
- Hysteria: Excellent for closing distances quickly
- Whirlwind: Provides mobile area damage that triggers lifesteal
- Umbral Edge: Offers both damage and defensive utility
Upgrades
The single most important progression for any Aurena player comes from unlocking two critical runes that fundamentally transform how you use Golden Explosion:
Aurena’s Key Golden Explosion Upgrades
These upgrades represent a dramatic power spike for Aurena. “Dismantle, Dissolve, Understanding” in particular transforms her from a high-risk specialist into an unstoppable damage engine when combined with sufficient cooldown reduction. The ideal rotation becomes: dodge → Golden Explosion → dodge → Golden Explosion, creating a seamless flow of massive area damage without the corresponding health costs.
Essences

Core Defensive Essences
- Essence of Clemency: The single most important essence for Aurena’s survival, providing lifesteal that directly counteracts the health cost of Golden Explosion . This essence transforms your aggressive abilities into healing tools, allowing you to recover rapidly after spending health for damage.
- Essence of Guidance: Converts excess healing into protective shields, working synergistically with Clemency to create an overhealing buffer that protects you between engagements . This shield becomes crucial against bosses with invulnerability phases where you cannot regenerate health through attacks.
- Essence of Vengeance: Enhances your damage based on missing health, perfectly complementing Aurena’s high-risk playstyle by ensuring enemies melt faster the closer you are to death .
Synergies
- Essence of Momentum: When attached to defensive abilities like Frostbite, this essence reduces cooldowns with each basic attack, enabling more frequent ability usage . While less directly impactful on Aurena than on some characters, it can enable interesting hybrid builds.
- Essence of Ricochet: Extends your area-of-effect coverage, particularly valuable in co-op scenarios where enemy density increases.
- Essence of Paranoia: Further amplifies your already substantial damage output.
Best Aurena Builds
The Golden Cascade (Recommended Beginner Build)
This build focuses on maximizing the potency and sustainability of your Golden Explosion while providing robust defensive layers to survive mistakes:
Table: The Golden Cascade Build Components
| Component Type | Specific Choices | Strategic Purpose |
|---|---|---|
| Core Ability | Golden Explosion | Primary damage source and health management tool |
| Key Essences | Clemency, Guidance, Vengeance | Lifesteal, overheal shielding, and damage scaling |
| Flexible Slot | Hysteria with Momentum | Gap closing with cooldown reduction |
| Defensive Tool | Beam of Light | Emergency repositioning and healing |
| Upgrade Priority | Dismantle, Dissolve, Understanding | Enable health-free Golden Explosion after dodges |
This combination creates a powerful gameplay loop: use dodge → Golden Explosion repeatedly for free damage, with Clemency healing any health you do spend, and Guidance converting excess healing into protective shields. Against single targets, weave basic attacks between explosions to maintain health levels through Dangerous Theory’s lifesteal.
Advanced Build Variations
Once you’ve mastered Aurena’s fundamentals, consider experimenting with these specialized variations:
- The Spin-to-Win Alternative: Replace your flexible slot with Whirlwind augmented with Essence of Voracity and Essence of Clemency. This creates a high-mobility area damage option that triggers your lifesteal continuously while moving . Particularly effective in dense enemy scenarios.
- The Glass Cannon Maximization: For experts comfortable operating at critically low health, replace defensive essences with additional damage amplifiers like Paranoia. This approach maximizes Vengeance’s damage bonus while relying exclusively on skillful positioning and the dodge→explosion combo to avoid health costs entirely.
Gameplay Strategies

Basic Combat Rotation
- Engagement: Approach enemy groups while using mobility tools to position yourself optimally
- Initial Burst: Execute dodge → Golden Explosion combo to deal massive area damage without health cost
- Sustain Phase: Against tougher enemies, weave basic attacks between explosions to maintain health through lifesteal
- Execute: Use repeated Golden Explosions to clear remaining enemies, spending health freely when you know the fight will end with your victory
Health Management Mastery
Aurena’s most challenging aspect is knowing when to spend health aggressively versus when to conserve. Follow these guidelines:
- Spend Health Liberally when:
- You’re about to eliminate the last enemy in an encounter
- You have Clemency active and multiple targets to heal from
- You need emergency crowd control against overwhelming numbers
- Conserve Health when:
- Enemies have invulnerability phases approaching
- You’re facing bosses with limited attack opportunities
- You’re at critically low health without defensive shields
Technique: Shotgunning
Against single targets or elite enemies, you can “shotgun” them by tapping Golden Explosion rapidly at point-blank range while using Clemency for healing . This technique generates enormous damage and healing simultaneously but carries extreme risk if the target becomes invulnerable or moves away during your cast sequence.
Boss Strategies
Skoll
Skoll punishes static positioning and slow reactions, making him particularly dangerous for Aurena who often commits to animation-heavy attacks.
- Charge Attack: When Skoll lowers his head, dodge immediately perpendicular to his trajectory
- Nova Projectiles: Maintain medium distance to create reaction time between wave patterns
- Area Explosions: Exit red circles instantly, then continue moving to avoid follow-up tree attacks
Aurena-Specific Strategy: Against Skoll, prioritize mobility over damage. Use your dodge→explosion combo exclusively, never spending health directly. The moment he begins any attack animation, disengage and reposition. Your damage windows are brief but frequent – patience prevails.
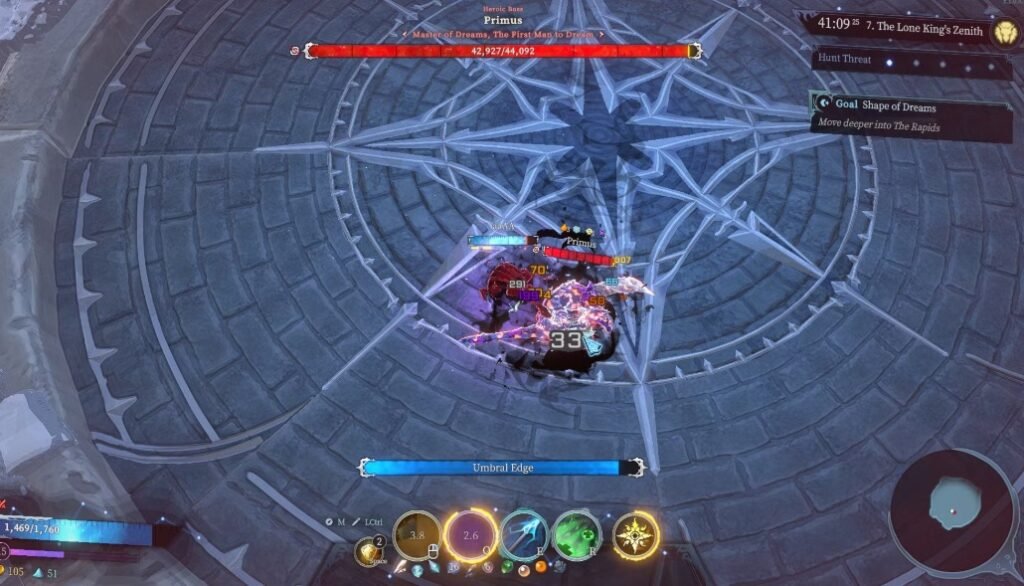
Nyx: The Final Nightmare
The ultimate boss presents unique challenges for Aurena, particularly her devastating black hole attack that can end runs instantly.
- Black Hole Survival: When you see the massive red circle and hear the audio cue, immediately run to the arena’s outer edge. Avoid panic-dashing early – save your escape ability for the last possible moment when the pull becomes strongest . Continue running outward as you’re slowly pulled in, using your dash only when necessary to break the final suction.
- Invulnerability Phase Management: Nyx’s periodic invulnerability represents the greatest danger to Aurena. Never spend health on Golden Explosion when she’s nearing an invulnerable transition. If you accidentally drain your health right before she becomes untargetable, you’ll have no way to recover until she returns – often with deadly attacks already in progress.
Final Thoughts
Mastering Aurena represents one of Shape of Dreams’ most challenging journeys, but few accomplishments feel more rewarding than seamlessly weaving between certain death and total domination. She transforms the game from a simple action roguelite into a delicate ballet of calculated risks and explosive payoffs.
Remember that even expert Aurena players occasionally misjudge their limits and meet sudden, dramatic ends. These moments aren’t failures but lessons in the dreamweaver’s eternal balancing act. Each run teaches you more about your limits, your capabilities, and the incredible potential waiting to be unleashed when you finally harmonize with Aurena’s destructive melody.