
Stuttering frames and sudden frame-time drops can ruin an otherwise playable gaming session on older PC hardware. If you are running an aging rig, learning how to safely overclock DDR3 RAM is one of the most effective ways to extract extra performance without spending a dime. Budget platforms powered by fourth generation Intel Core chips or AMD FX processors often leave significant bandwidth on the table simply because the memory runs at stock speeds.
Many legacy systems still rely on standard 1333MHz or 1600MHz modules that severely restrict modern gaming workloads. By tuning memory frequency and tightening sub timings, you can smooth out erratic frame pacing and drastically improve your 1% low frame rates.
Why DDR3 RAM Bandwidth Dictates Frame Time Stability

Modern game engines demand fast access to CPU caches and system memory to stream textures, process physics, and manage background assets. When memory bandwidth hits a bottleneck, the processor stalls while waiting for data, creating noticeable micro stutter even if your average frames per second look acceptable on paper.
Pushing stock 1333MHz or 1600MHz sticks up to 1866MHz or higher expands memory bandwidth by up to 25 percent. This bandwidth surge reduces the latency penalty during intense scenes, allowing the CPU to feed modern graphics cards with far fewer interruptions. Consequently, games feel significantly smoother and more responsive to mouse input.
Prerequisites and Safety Precautions Before Tuning
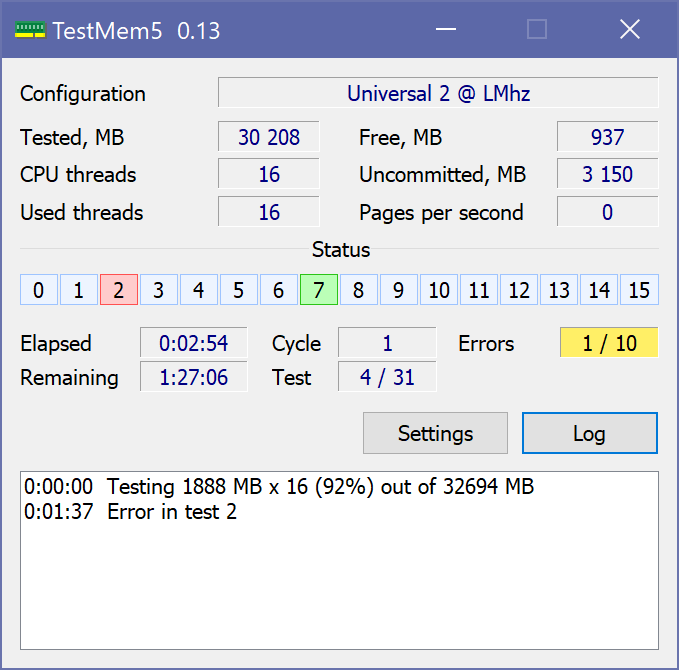
Before adjusting any BIOS parameters, preparing proper testing tools ensures that you protect your components and maintain data integrity. Overclocking memory carries minimal risk if voltage limits are respected, but stability testing is mandatory to prevent corrupted system files.
Download reliable diagnostic software like MemTest86, TestMem5 with the extreme config, and HWInfo64 to track system voltages and temperatures. Furthermore, ensure your motherboard features a capable chipset that supports memory tuning, such as Intel Z68, Z77, Z87, or Z97 boards, or AMD 970 and 990FX platforms.
Safe Voltage Limits for DDR3
Standard DDR3 operates at a baseline of 1.50V, whereas low voltage DDR3L defaults to 1.35V. For daily, long term stability on standard modules, keeping DRAM voltage between 1.55V and 1.65V is completely safe on desktop platforms. Avoid pushing past 1.65V unless your sticks feature dedicated heatsinks and your chassis has adequate airflow.
Step by Step: Pushing from 1600MHz to 1866MHz
Now that your safety parameters are set, reboot your computer and enter your motherboard BIOS by tapping the Delete or F2 key during startup. Look for the advanced overclocking section, often named Ai Tweaker, OC Menu, or MIT depending on the manufacturer.
Step 1: Record Baseline Timings
Locate the DRAM configuration section and document the default primary timings: CAS Latency (CL), tRCD, tRP, and tRAS. Most budget 1600MHz kits run at 11-11-11-28 or 9-9-9-24. Taking a picture of your starting values provides a reliable reference point if you ever need to reset your configuration.
Step 2: Increase Memory Multiplier and Loosen Latency
Raise the memory frequency strap to 1866MHz while temporarily relaxing the primary timings to prevent boot failures. For example, change tight timings like 9-9-9-24 to a looser configuration such as 11-11-11-30 with a Command Rate (CR) of 2T. This gives the memory controller room to adapt to the higher clock frequency.
Step 3: Adjust Voltages
Set DRAM Voltage manually to 1.60V to provide adequate headroom for the increased clocks. If your system runs an Intel processor, slightly increase the VCCIO/VTT voltage by 0.05V to stabilize the integrated memory controller. Save changes and exit BIOS to test if the machine posts properly.
Fine Tuning Timings and Verifying Real World Gains
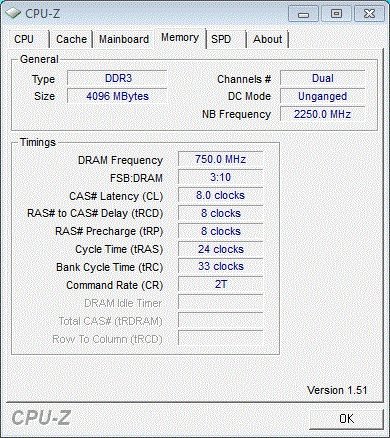
Once your machine boots cleanly into Windows at 1866MHz, you can start tightening timings downward step by step for lower latency. Try reducing CAS Latency to 10-11-10-28, testing stability after each incremental change.
Launch TestMem5 and run at least three complete cycles without errors to guarantee memory stability under load. If errors appear, raise the DRAM voltage to 1.65V or loosen the offending timing by one tick until the system passes completely error free.
To measure your progress, run a built in benchmark in titles like Counter Strike 2, Rainbow Six Siege, or Shadow of the Tomb Raider using an overlay tool like CapFrameX. Look closely at the 1% and 0.1% low metrics rather than average frame rates. Eliminating sudden dips from 25 FPS back up to a steady 55 FPS completely transforms the playability of fast paced games on legacy hardware.
Final Thoughts
Investing thirty minutes to optimize DDR3 memory frequencies revitalizes aging gaming rigs without adding costly hardware upgrades to your budget. By maintaining moderate voltages, validating stability with automated stress tests, and locking in tighter primary timings, you can enjoy a stutter-free gaming experience on hardware that still punches well above its weight.